
The Ruler of Dalaran from World Of Warcraft.
Beware, beware of me.
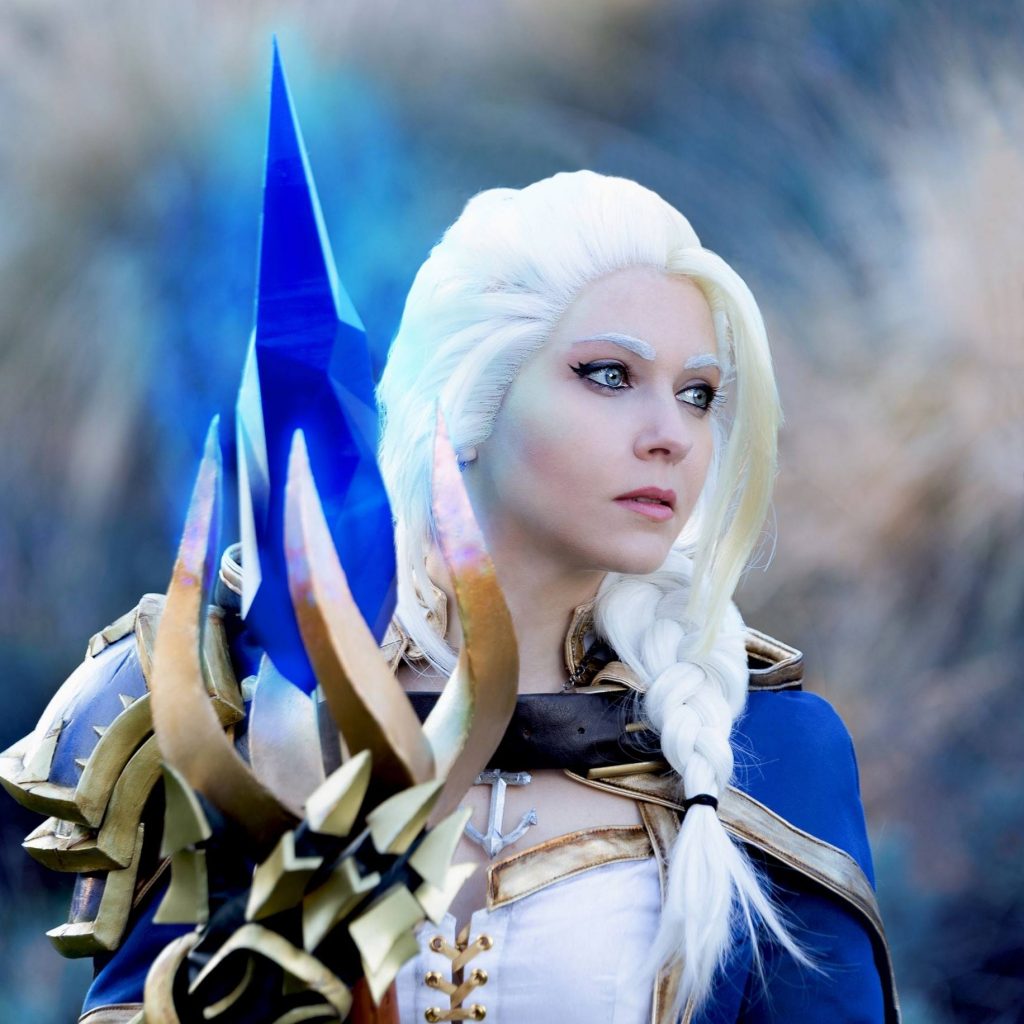
Photographer: eurobeat_kasumi_ebk | Hagakure Photography | Kimimaro Meteordust
Shortly before Blizzcon 2017 I thought about doing a remake of my very first self-made costumes, Jaina. There was the “Knights of the Frozen Throne” expansion for Hearthstone, where they turned a bunch of WoW characters into Death Knights, Lichs etc. Since I’m a Frost Death Knight myself I really dug the idea and the design for Frost Lich Jaina. I dropped the idea of making this my Jaina remake real quick after the reveal for Battle of Azeroth and the return of Jaina. And since my husband and me were going to visit Blizzcon in 2018 I also decided to bring this costume along.
Overall data
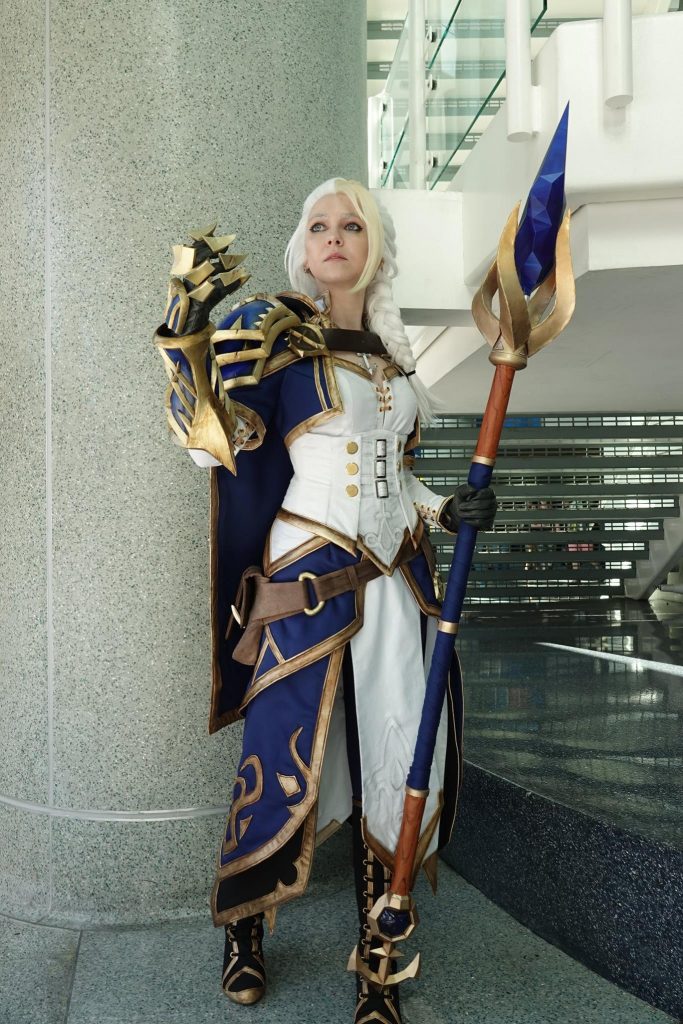
Source: World of Warcraft (Battle for Azeroth)
Work time: 350 hours
Materials used: EVA foam, LED foam, foam clay, Worbla’s Black Art, Worbla’s Transpa Art, PLA filament, PET filament, PVC pipe, clear acrylic pole, black cotton fabric, white cotton fabric, white silk fabric, blue polyester fabric, golden stretchy pleather, brown pleather, metal boning, buttons, eyelets, belt sliders, buckles, PlastiDip, Flexbond, acrylics, gilding wax, glass paint, Vallejo pigments.
Making of
I started way too late with this costume and despite that I also didn’t keep working. And if that weren’t enough I also massively miscalculated the time I would need. I still don’t know how I managed to finish this costume.
In June 2018 I styled the wig and then I did nothing until August. This is when I made the pauldron, the gauntlet and the vambrace out of EVA foam. This was also my very first time making more complex foam armor and decorating it with triangle shaped stripes of EVA foam. I commissioned Tsuya’s Cosplaywerkstatt again to draw the patterns of the fabric parts for me. I then started with the blouse and the corset. The corset has a proper metal boning to keep it neat and stretched (This also made the metal detectors at Blizzcon deflecting XD). The ornament on the front lower part of the corset is a silk appliqué and also later shaded with Vallejo pigments by Matt from Brazen & Bold Productions. This was also the same process I did with the ornament on the white front and back parts of the skirt. The tricky part on the blouse are the eyelets. Not so much they in the front but those on the sleeves. There are 15 eyelet pairs on each sleeve. Also tricky bout the blouse: the collar. It is very tightly wrapped around her neck and do get my collar to do the same I sewed in a small fabric strap to hook a transparent bra strap to it, which tightened the collar around my neck. The golden edges and ornaments were a huge part. I did the ones on the blouse, the bolero, the corset and the hood of the cloak just with the stretch pleather, but for all other parts I used 2 mm foam to pad them. Here is where I terribly miscalculated the time it would need. I thought It would take me around 3 days to get the golden ornaments and edges of the cloak and the skirts, but they ended up taking me 9 days! I got the boots sewn together quite fast despite the fact that I made them twice because I didn’t like the first ones (to low and asymmetrical high). I did the patterning again with my beloved cling wrap and masking tape method. I also took a good look at some sneakers of mine to figure out how to sew everything properly together. The boots are fully functional to be laced, but nobody wants to lace boots with so many eyelets every time when putting them on, especially not with with this lacing technique – so I sewed in a zip in the back.
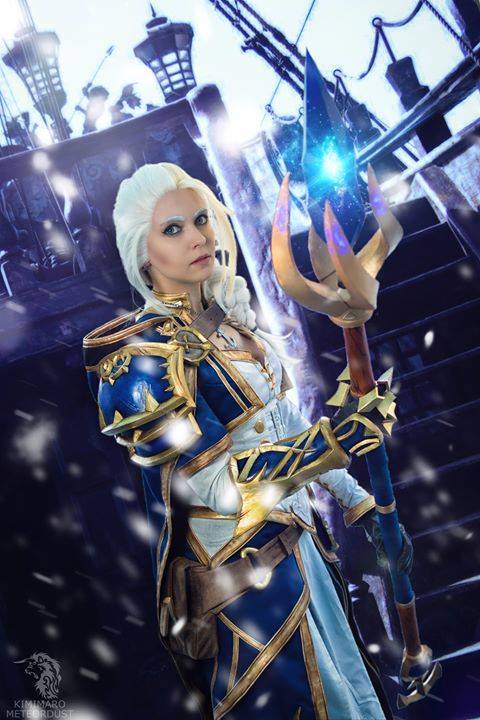
The staff was built in only 2 weeks. My husband ripped the model from the game and cleaned it up in Blender (deleting all the weird glowing effects around the crystal and also separated all the parts we needed for 3D printing. We bought the Prusa I3 MK3 and this was it’s very first stuff to print. We first printed the spiral spiky things in 1:2 so I could pattern them off this print. The base without the spiral spikes and the anchor on the end of the staff were also printed as well as some details for the costume such as the emblems, the gem for the white skirt in the front and the Lord-Admiral’s anchor pendant. I sanded everything and primed it with black pébéo Gesso Decospray and painted it with gilded wax and acrylic paints. For the gem in the anchor at the bottom of the staff was done with Worbla’s Transpa Art and then painted with glass paint. The crystal was printed as two hollow halves with transparent blue filament. Inside were a motor, batteries and LED lights and the crystal was then fitted on an acrylic pole so it would create the effect of a floating crystal. The spiral spikes I mentioned earlier I made out of LED foam. Inside the top of the spikes I glued blue LEDs. I primed them with Flexbond so they would still be transparent. I then painted them with transparent and opaque acrylic colors in the kind of pattern that would make the LEDs shine through like growing ice. For the handle of the staff I used the same fabric as for the clothing of the costume, I just took a very long stripe and wrapped and glued it around the PVC pipe. The golden rings around the pole and the wooden details are just 2 mm EVA foam wrapped around.
We were flying to LA on Tuesday before Blizzcon at 7 am and on Monday we took a trip to Brazen & Bold Productions to weather the clothing and also to give the golden parts of the armor a slightly darker wash. Matt did an awesome job on shading all the golden pleather and also the white fabric parts. We came back home from our visit in Vienna at 9 pm and I still had to do a few things. But by the time we arrived in our home town we noticed our phones had no reception. (There was a huge storm.) And when we finally came home we had exactly 5 minutes of power and then everything went dark. The storm had knocked out the power. Oh, and did I mention we also hadn’t packed our stuff? After about 20 minutes the power went back on for about one minute and then it was out again. My husband went to bed, but I kept on painting the golden and wooden details in candle light and occasionally also with a flash light (which I was holding with my mouth XD). At 11 pm I figured that it would be better to continue working later at night because I still needed to secure my pauldron to the cloak and I needed my sewing machine to sew on the Velcro tape. So I went to bed and got up at 3 am. My husband packed his stuff and my costume while I still sewed Velcro to my cloak and to some foam which I glued to the inside of the pauldron. Also I still had to secure the finger armor to the glove (these were cheap pleather gloves btw.) so I packed a sewing kit and some foam stripes as well as glue and other small stuff for a cosplay emergency kit.
So the last part of the costume I did in our motel in Anaheim, I like this kind of securing finger armor the most. I sewed small bits of foam to the glove and then glued the finger armor onto this foam bits. I think this is the best way to secure foam to fabric or leather/pleather.
And so it was done! I made Jaina in only 3 months and I was very lazy in August and September. It has been hell of a experience but I was so happy to wear this costume to Blizzcon!
My first Jaina (2013)

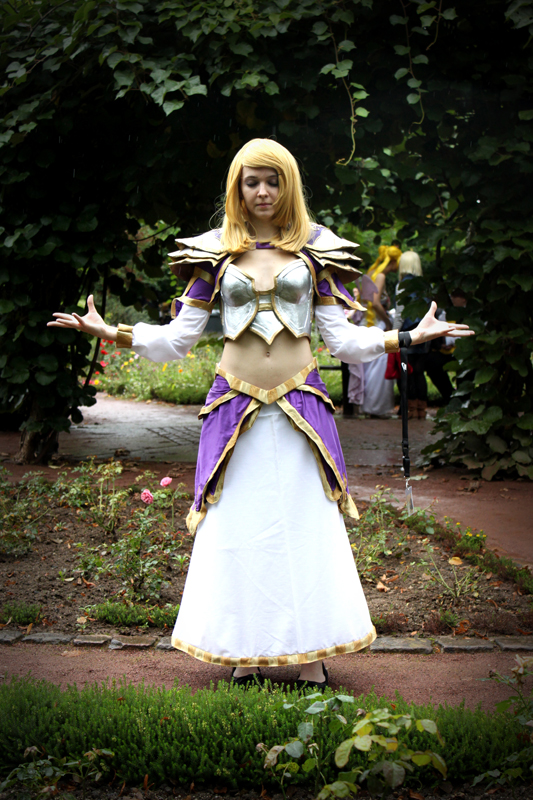
When I started with WoW at the very end of Cataclysm almost at the beginning of Mists of Pandaria I played Alliance as Worgen Rogue, one reason I got interested in the game were Worgen, I just love Werewolves. So Jaina was of course a character to cross paths with, especially in the Stratholme dungeon in the Caverns of Time. Her design wasn’t too difficult and since she would be my first selfmade costume it was just perfect for the beginning.
Overall data
Source: World of Warcraft (Cataclysm)
Work time: 150 hours
Materials used: curtain fabric, silk, Worbla’s Finest Art, craftfoam
Making of
I began with the armor parts, the breastplate was really fun to make and right after bracers they a still one of my favourite parts of armor to make. I slip in at the front and put the middle part behind it, not like the most breastplates which have the opening at the back. I was pretty afraid of the pauldrons to make because there is no exact way to make them because of their different shapes and sizes. The pattern for the jacket was created free with some paper sheets. I also used paper to make out the position and shape of the violet parts of the skirt.
The armor parts are made out of Worbla’s Finest Art and for the breastplate also with craftfoam in the middle. For the pauldrons I created a prototype with a styrofoam dome and cardboard and stretched Worbla’s Finest Art over it. For the bigger details on the edges I used paper clay and covered them with Worbla’s Finest Art, the ornamental details is also out of Worbla’s Finest Art. I have got them attached with straps of velcro tape and D-rings right onto the jacket and a strap that goes invisible behind the collar on my back connecting the pauldrons so they also hold each other. The jacket and the top parts of the skirt are made out of some kind of shimmery fabric and the white longer sleeve out of a piece of silk I had left exactly for the long skirt and the sleeves. For the golden details I used a curtain fabric I found at a local store.
If you are interested in the creative process feel free to take a look at my progress photo album on my Facebook page.
You must be logged in to post a comment.